Following on from the previous post, here are closeups of the second new shelf. The shelves are inside a pine wardrobe built into a chimney alcove, long since unfit for purpose but I'm averse to ripping out period features so it now houses toy soldiers and the original doors provide some protection from the dust.

In the background are a group of Neanderthals made in France by Starlux.
In front of them are hoplites made in Greece by PAL and later versions made by Athena (Aohna), the easiest way to tell them apart is the earlier PAL figures have a flat square base with no markings underneath while the Athena ones have a sculptured base marked Aohna underneath, the PAL versions also have metal pins attaching their arms.
In the left foreground are Greeks/Romans made in Italy by Tibidabo (green bases) and to their right are two made in France by Clairet (tan bases)
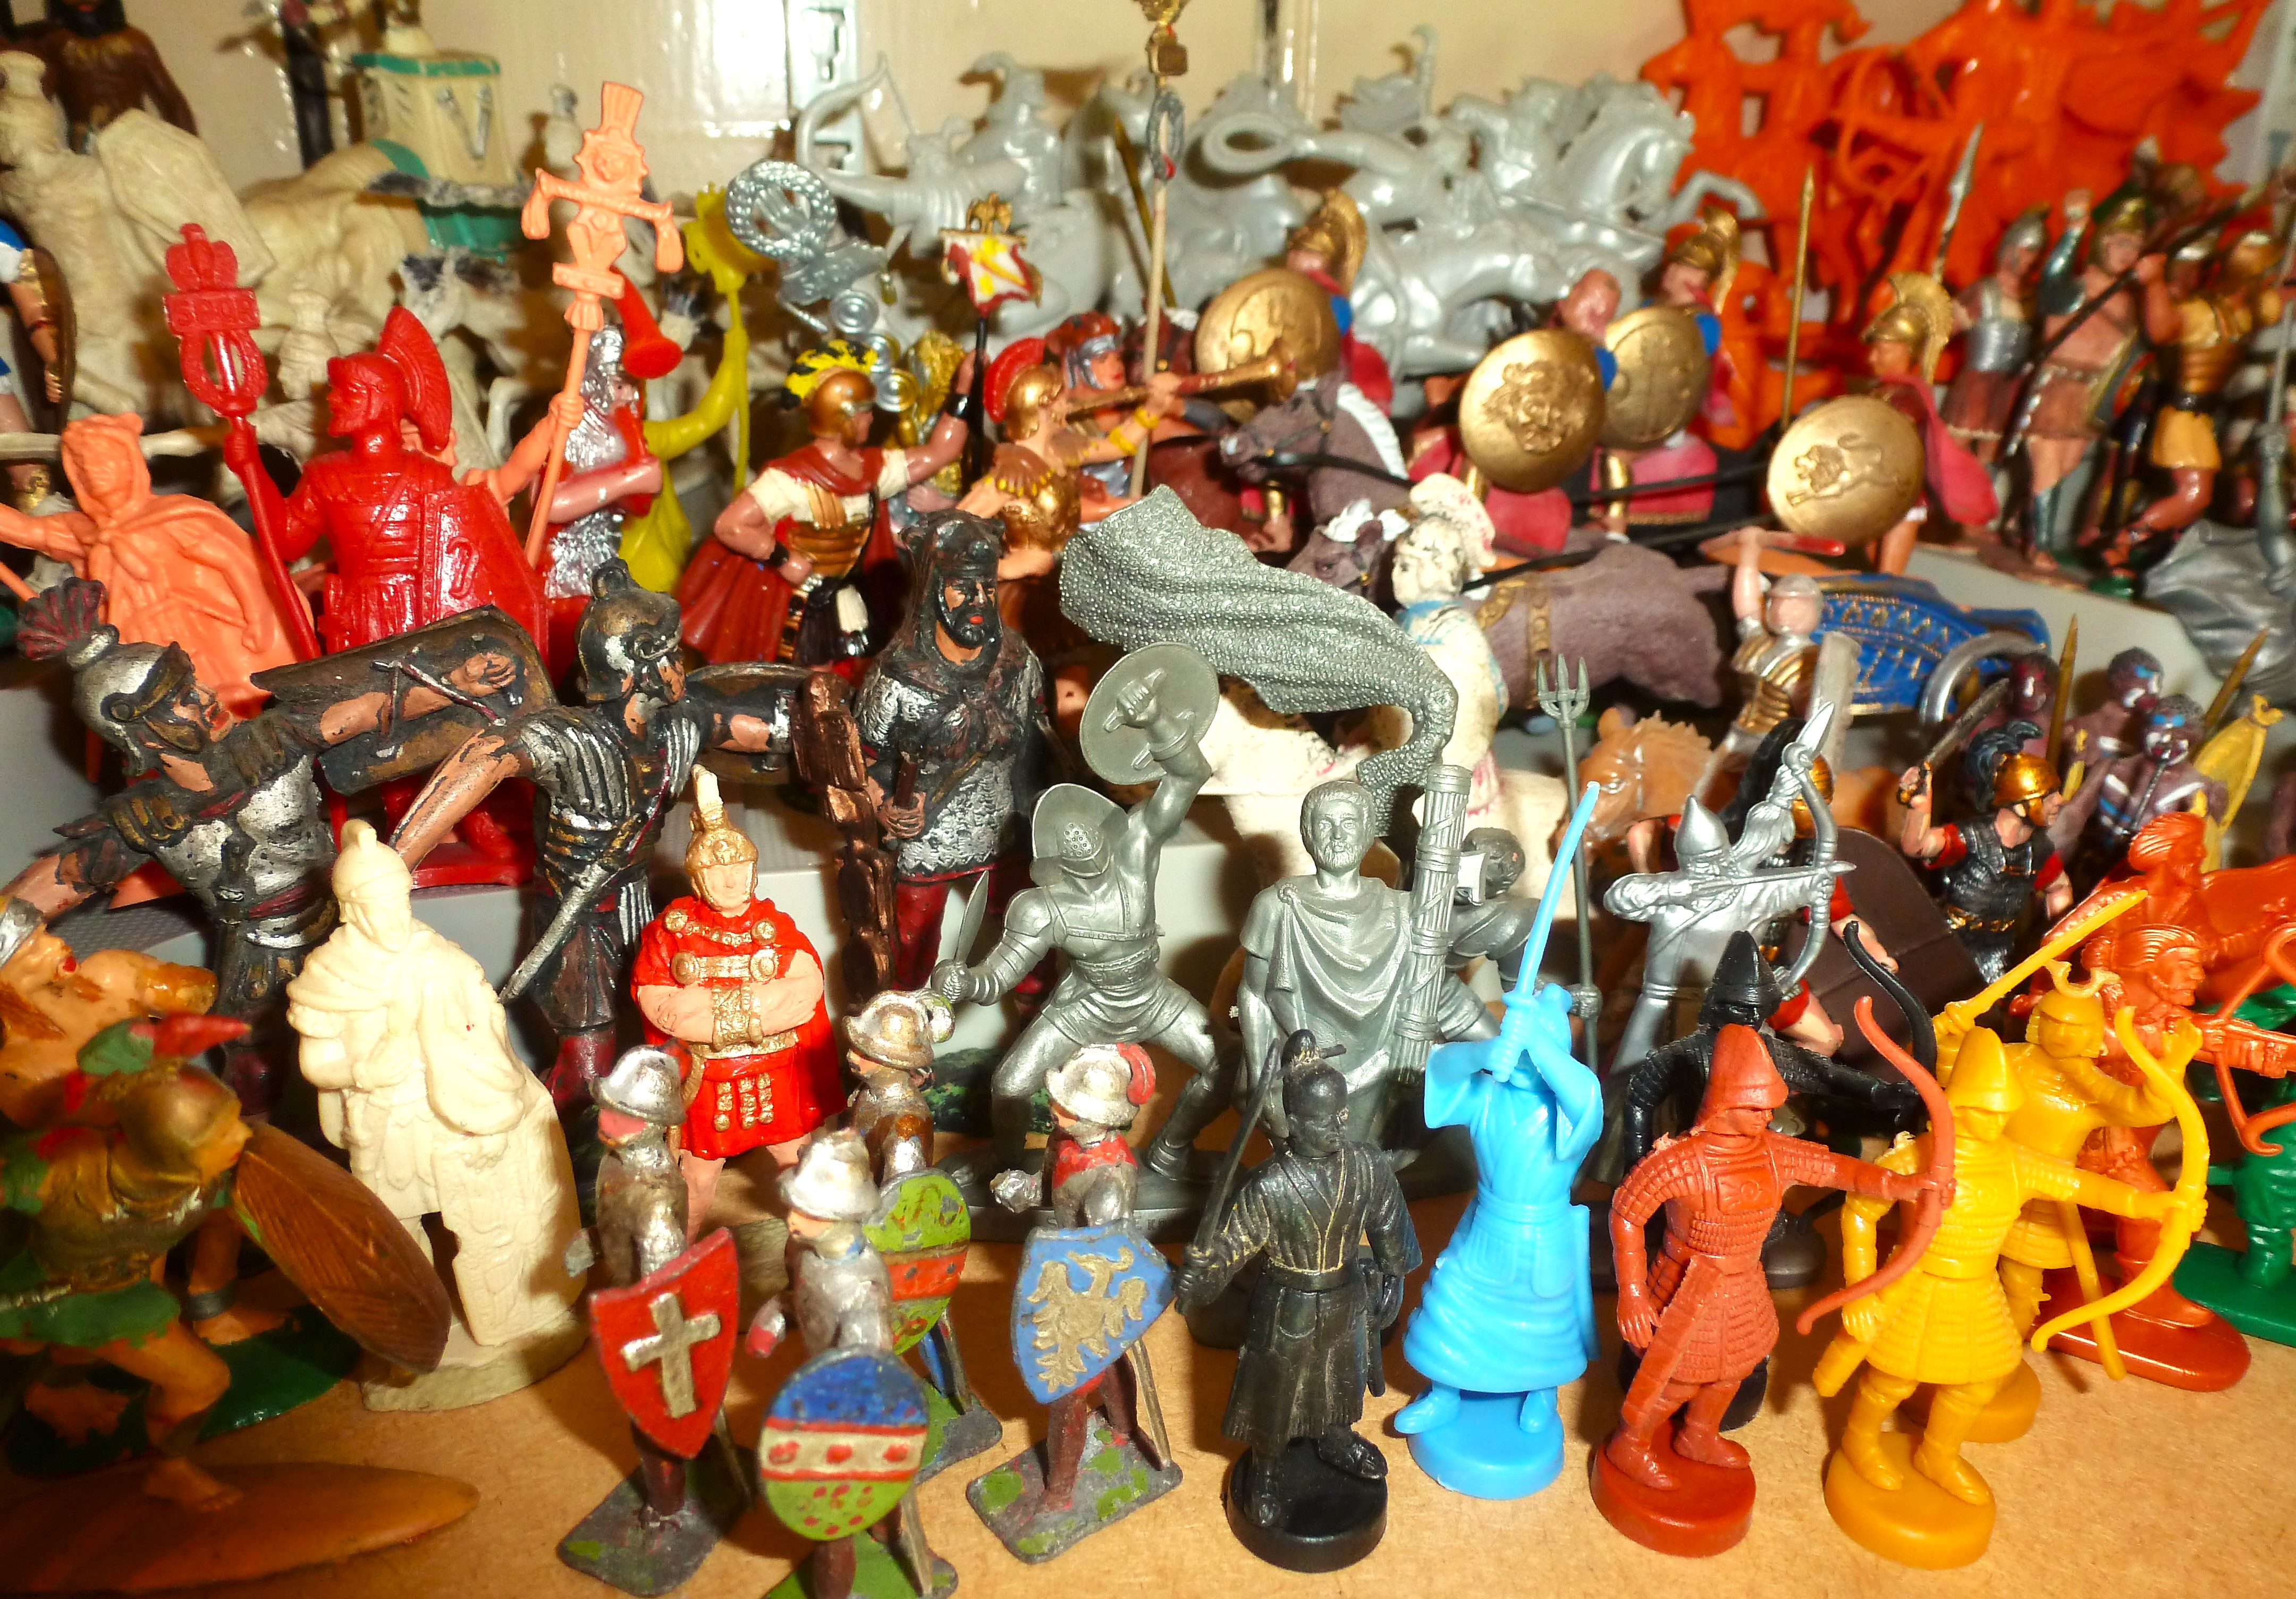
In the centre, various Roman signifiers by Atlantic, REAMSA, Marx and Elastolin, in front of them are three large rubber figures made in Italy by Xiloplasto.

The large colourful figure in the sentre is one of the Louis Marx Ancient Chinese Warriors. The large blue Romans beside him are reissues made in Spain by Oliver.

The two Samurai at rear left were made in Poland by PZG (the Polish Association of the Deaf), in front of them are Ancient Egyptians made in Spain by Jecsan, with more Samurai to the forefront, these ones made in Italy by Res Plastics for Kinder eggs.

A better view of the Res Plastics Samurai, I started picking these up with the intention of creating a wargames army with them but the fiddly parts and loose weapons made them impractical for this, so they are now consigned to the shelf and my Samurai armies are now made up from Technolog, Furuta, gashapon and various kit figures.

In the centre the unpainted Roman and Tribune in red cloak were sculpted by Peter Evans and cast in Resin by Peter Cole (before he set up his company Replicants to make figures in plastic), the idea was that they would make additional poses to go with the Louis Marx Ben Hur playset which had just been reissued from the original moulds by a company in Mexico.
To their right are two coffee premiums made in Belgium by Cafe Storme.
The four Carolingians marching in the foreground are 45mm solid lead figures made in Germany by Heyde.

The large mounted Roman on the left was originally made France in hollowcast lead by JSF (Jouets Standard Francais), this is a plastic version made form the original mould. On th right next to him is another mounted Roman, made in Hong Kong it is a copy of a Crescent foot figure on a copy of a Herald horse.

This is the set of four made by Res Plastics for Kinder eggs, they are often described as being Samurai but I am advised (by someone to knows vastly more than I do about ancient armour) that they are in fact Ancient Chinese (they still look like Samurai to me, what do you think?)


