Showing posts with label Italieri. Show all posts

Wednesday, 31 December 2025

Romans and Gauls by Allan Tidmarsh

 Searching for a participation game that can be played on a small table in a couple of hours with simple rules and 54mm toy soldiers, Anthony dug through his extensive wargaming library and just before Christmas he found this:


An article in an old wargaming magazine furnished this scenario along with "Very Simple Rules for Romans V Gauls", the rules cover just a single sheet of A4, played in an area 7' x 3'.  Written by Allan Tidmarsh (Tidders) a well known wargame blogger, and his full rules can be found here on his By Toutatis blog (link also in the list on the right).  

 Overview of the table, top left sees a Roman supply column making it's way to relieve the watchtower across the river on the right.  Ahead of them, skulking in woods on the hill a small warband of Gauls have spotted the Roman column and prepare an ambush.  Across the river the main body of the Gauls are camped by a ford while another small warband patrols the outlaying land.


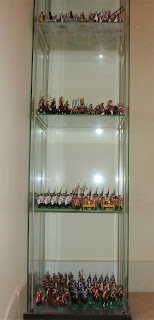
Many of the Gauls in my collection were made by Alan and feature in the photos on his By Toutatis blog, they include figures by HaT, Italieri, Cafe Storme and Expeditionary Force.  My Roman troops are all Toyway/Timpo figures similar to the ones which he also used in his games. 


The Roman supply column comprising four units, lead by Legionaries with Centurion, followed by the supply detail and flanked by Auxiliary archers while another unit of Auxiliaries brings up the rear.

The game mechanics are easy to pick up, ideal for a participation game and leave plenty of room for players to customise to their particular scenario.  Players dice for initiative each turn, winner goes first, the standard move for infantry is 6" modified by a further dice throw for each unit to increase or decrease the distance by 2", so that a column like this might bunch up or get strung out on the march.

The player who lost initiative then moves his units in the same manner, after which any firing and melee take place if needed, followed by a morale test for any unit that is reduced to 50%.  And that's the end of the turn. 


The larger warband comprise the figures I painted up, mostly made by HaT and Italieri, they will need a bit more work to bring them up to the standard of Allan's figures


As the supply column proceeds, the movement modifiers have caused the Auxiliary archers to advance beyond the main body of  troops, seeing this the Gauls spring their ambush and erupt from the treeline to attack.  
In the firing phase the archers loose arrows and cause casualties but not enough to blunt the impact of the Gallic charge (no melee or morale test occurred at the end of this turn).  


Seeing the threat ahead the Centurion leads his Legionaries to support the archers while sending the supply unit to safety and ordering the Auxiliary infantry to extend the line.  The warband crashes into the lightly armed archers, cutting them up roughly and prompting a morale test which causes them to fall back on the Legionaries to hold ground.


The melee continues with the Warband breaking the archers but being contained and held by the better armed and disciplined Legionaries. 

Hearing the commotion of battle the main body of Gauls break camp and cross the ford to join the attack while the Auxiliary infantry form up on the flank of the Legionaries.

The second small Warband remained across the river to prevent any attempt by the watchtower garrison to brake out and come to the aid of the column.


The troublesome archers have been eliminated but the original attack has lost it's momentum and been thrown back, during the melee the Legion line has become disordered and both sides end the turn facing each other, winded, but holding their ground.

The fresh Warband throws itself against the Auxiliary line, spears and pilums are thrown by both sides but casualties are light.   The line holds as the charge hits home but gaps open during the melee allowing the Gauls to slip through and around the flank, their greater numbers begin to tell and before long the Auxiliaries are overwhelmed.

While the Gauls are taking trophies the supply unit quietly slips away into the wooded hills, but with another Warband patrolling the opposite riverbank it's unlikely they will get through to the watchtower.
_ _ _ _ _

I felt the melee rules worked well, only figures touching base to base are included in the combat up to a maximum of 3 against 1.  If it's 1 attacking1 then both throw 1D6, if 2 against 1then throw is 1.5 D6 (rounded up) v 1D6 or 3 against 1 it's 2D6 v 1D6 all scores subject to modifiers, highest score wins.  The short rules don't specify that the scores are cumulative so we decided that they were not, i.e. when 3 attack 1, both throw 1D6, if the attacker loses he throws a second dice if this is higher than the defenders original score then the attacker wins.  

When firing, bows have a range up to 18" and can be a serious threat, spears/pilums reach only a short distance of 4", we allowed all troops a resupply of missiles to avoid unnecessary record keeping.  Hits are decided by dice score, modified by range and cover, casualties from firing and melee are all subject to saving throws.

So there we have it, the intention was to test the rules and scenario as written with a view to future use with participants.  I thought they would fit the bill being easy to understand and quick to play, with no record keeping.  They would also easily adapt to other periods, personally I would prefer to use a larger area (6' x 8') and double the movement/firing distances, but we were specifically looking for game to run on a smaller table.       

And finally may I wish you dear reader good health and happiness throughout 2026. 

Sunday, 20 August 2023

The perennial problem of basing. It's boring I know!

I collect old toy soldiers, I wargame with 54mm toy soldiers, and I have got too much stuff.  Like everyone else I have too many collections, too many projects on the go and to be perfectly honest it's all become a bit of a mess.....actually it's a lot of a mess.

To impose some semblance of order on the wargame bit I plan to review what I've already got then for each period create initial core armies of 100 foot, 20 mounted and 2 guns.  These numbers were suggested by H G Wells as sufficient for a game, and this seems eminently sensible to me, when I reach the required numbers I will stop and move on to something else.  That's the plan, in so much as there is a plan.  Anyway it's the only plan I've got so with this in mind I broke out my Celts:

Here is the current foot contingent........and already we have a problem.  

I have sufficient toy soldiers to make up the requisite number of foot, the mounted are based, undercoated and awaiting paint, there are also enough bits waiting to be assembled into 2 war chariots. The figures hail from a number of manufacturers including Italieri, HaT, Cafe Storme and Expeditionary Force.

I started this project by painting up units of foot, then got bored and moved on to something else.  Then several superbly made units came up for sale and I couldn't resist the opportunity to jump start the project again.  The problem is integrating my existing figures on the smaller bright green bases above with the new acquisitions on larger flocked bases.

I always base my toy soldiers individually.  Here my old ones are on 2p coins while the new acquisitions are on flocked poker chips, so there is a noticeable size difference.  I don't get worked up about frontages and larger bases are fine for irregular troops but I do care about the overall appearance and want them all to look roughly similar as this pulls them together visually as a unit, also the new ones look like they are running across someone's carpet!

So what to do about this?  I don't think the new additions will give up their poker chips easily but I could probably scrape some of the plush flock back, at the same time fixing the older figures to washers which would give them a similar base size.  have I just answered my own question or can you think of a better solution?  All suggestions gratefully received.

Friday, 15 April 2022

Upcycling a display cabinet for toy soldiers

 Some years ago I picked up an IKEA display cabinet in a charity shop, and have been very pleased with it.  I got it for a reasonable price, and some time later learned that it is their DETOLF model, which is a "Best Seller" and is still available brand new for a very reasonable £65.  Here's what it looks like:

I use it to house my 7 Years War collection of wargames armies, which are quite attractive figures but the collection has now outgrown the four shelves in the unit.  It can house about 300 foot figures but as you can see the big drawback with this unit is that there's a lot of empty space and for years I've been looking for a suitable method to install additional shelves.  A few weeks ago a friend on facebook gave me the heads up on a firm in Northern Ireland who produce custom made supports and Perspex shelves for this very unit.  So I got some! 

The original shelf for two Regiments of Infantry (BMC AWI), two guns and two companies of Grenadiers (HaT and various conversions).  The new shelf supports are a bit fiddley to attach but after acouple of goes you start to get the hang of it and I managed to add a further eight shelves in the space available.

The new layout with additional shelf, for 2nd Cuirassiers, two more Regiments of Infantry and some light troops.  The figure of Old Fritz on the left is an early tin flat.

The original display of the Cuirassiers was a bit cramped.  The bronze disk in the foreground is dated 1757 and is a Campaign Medal issued for the battles of  Lissa (Leuthen) and Rossbach, I found it in a junk box of old coins 50 years ago when I was a teenager working a Saturday job in London's Portobello Road Market, it seemed appropriate to display it here.

The Austrian shelf (these also double as French but I need to do more flags) Three Regiments of Infantry (HaT Prussian infantry), two companies of Grenadiers (Italieri) a unit of Pandours (various conversions) and two guns (BMC)

On the left are the Russian contingent (BMC AWI) and on the right the Army of Brunswick (Marx infantry and HaT cavalry)

New layout with additional shelves.  The Brunswickers on the top shelf and below them the Austrians with the Pandours at the front covering the guns.

And finally a closer look at the Russian Infantry and Artillery.

Saturday, 26 September 2020

Not Quite Victorious Army

 But I'm sure they will be when they eventually get onto the table for a game!

For some time now I've been building up a generic Chinese army, I'm not sure why and I can't remember how it started, perhaps I just like the colours.  And the flags, the flags are great.  Anyway, there is no grand plan, I just bang out another unit every now and then when an idea comes to me, it's quite therapeutic, doing something different.  Here's what I've got so far:


When I call them generic what I have in mind is that they will be used as an opposition in a Colonial scenario or possibly in the "Back of Beyond" or even at a stretch against Samurai.


These irregulars in black pyjamas and red bandanas are based on the Vietnamese Pavilion Noirs, mostly made from Hing Fat and other pirate figures, some have been given shields from wooden disks, others have Chinese heads (from Dorset Model Soldiers) just to give a bit of variety.


The flag has been cut out using pinking shears to give it a scalloped edge.  The inscription means something but I can't remember what, hopefully nothing rude.


Imperial Infantry, Artillery and Cavalry in the centre, irregular horse on the flank.


The matchlock men are more Hing Fat pirates, their tunics extended with plasticene, otherwise just a paint job.  The spearmen are medieval knights, made in China, which are currently available everywhere, and very useful they are too.  For a more Quing period look they've been given plumes on their helmets and replacement spears from metal rod with tassels added.


The cannon started life as a table cigarette lighter, it looked sufficiently gaudy for the job and just need a spruce of paint.  The crew have been given Mandarin hat heads (Dorset Models again).


The Imperial Cavalry started life and Italieri Mongols, the flags I found on the internet and just played around with them in Publisher.


The irregular Cavalry are the remains of the Italieri Mongols padded out with some Huns made in Spain by Jecsan.


More of the irregular Cavalry.

Monday, 4 June 2018

One Hour wargames - Smolensk 1941 with 54mm toy soldiers

At the weekend Anthony and I got together for our fourth game using the One Hour Wargame rules. Flushed with the success of our Napoleonic game we felt ready to take the next step and devise our own scenario, I chose to base it on the First Battle of Smolensk in July 1941.  We aren't sticklers for accuracy but do want the thing to feel right so the Germans had to be light, fast, hard hitting and cohesive while the Russians would be steady, solid, and hard hitting but uncoordinated. It's been a long time since I've played a  WW2 wargame with 54mm toy soldiers, here's how it turned out:

The German motorised units deploy to force a bridgehead across the river Dneiper. A reconnaissance unit dashes across the bridge, supported by elite assault troops, heavy and light tanks, antitank, mortar and two infantry units. A total of eight units, see note at end of post for further explanation about troop types.

The Russian defenders lie in wait; on the left, infantry in the woods backed by a unit of heavies, blocking the road to the bridge is an antitank gun, behind it KV1 and KV2 tanks are hull down on the hill, behind them the Guards division is held in reserve and the mortars await firing instructions. On the right two more units of infantry and two of navy have take up position in the woods and ruins of the city's suburbs. A total of 12 units.

A very strong position with defence in depth, the winner will be whoever holds the hill (where the tanks are stationed) after 15 turns.  In the actual battle the Russian forces put up a strong fight with fierce counterattacks but a weak command structure meant that they were poorly coordinated, to represent this we used the Shambolic Command rule (see here) so that the Russian Commander could only move or fire up to four units each turn.

The bridge is a vintage tinplate railway piece made in Germany by Gebr. Bing (Bing Brothers) around 1900, these usually sell for about £60 but this was in such poor condition I got it for £1 (about 20 years ago) I finally got around to stripping and repainting it for this game (there's nothing like a deadline to get things done). I painted it as a road bridge because the rail gauge is too large to go with the British made Triang railway tracks that I have.  The wooden western town buildings represent a peasant village or dacha (or something like that)

The badly mauled reconnaissance unit veers off the road to make way for the Pzw II and Stug following in support.

The Pzw II is a vintage piece made in Germany during the 1930's by GAMA, I thought it looked right at home in this setting.

The infantry have effected a river crossing by boats, just as they did at Smolensk in 1941, to represent this each unit must first advance to the river bank then next turn it can dice to activate the crossing by achieving 6+ from a throw of 2xD6, if it fails it remains where it is. Needless to say, only infantry on foot can cross like this, vehicles must use the bridge.

Units can move or fire in each turn but not both, apart from the mortars they all have a firing range of  2 feet.  The mortars have a range of 8 feet but needs a friendly unit to spot for them, the spotter needs to be within 2 feet of the target and have clear field of sight to them.

The two Russian naval units occupied the suburbs of the city, here represented by Airfix Strongpoint buildings which have been enhanced with fallen rubble and collapsed rafters.

Heroes of the Soviet Navy scramble through the ruins. The individual figures are mounted on metal bases which enables them to stand on uneven or sloping surfaces and prevents the tumbling domino effect. To make two distinct units I painted all the riflemen as white jackets, so they could also double as WW1 Russian/German sailors, the figures with automatic weapons became blue jackets so can only be used for WW2 and later.

Out of shot, at the far end across the river the Russian partisans have finally attacked the German mortar unit but are more of a distraction than a threat and are seen off without difficulty. The use of partisans is another special rule which we devised for our last Napoleonic game (see here) they can appear from any piece of cover or any table edge at any time subject to being activated by a throw of 6+ on 2xD6 - a very simple but effective game mechanism.

The German force has taken the bridge and cleared the surrounding woods but they are now too depleted to withstand the inevitable counterattack. 

The Russian heavies move in for the kill as they retake the hill and woods around the bridge.  In hindsight I think I gave the Russians too much cover, even with just four units firing each turn they were able to pick off the Germans quite leisurely. Also I made a tactical error in trying to punch through with the armour from the start, I should have infiltrated infantry across the river one unit at a time to spot for the mortars and soften up the defences before releasing the tanks. Ho hum!

The Russian mortars, these truly are the kings of the battlefield.

In 1941 the Germans forced the crossing and held the bridgehead against repeated counterattacks but the Russians retreated due to the threat of being cut off in a pocket by other German armies advancing to the north and south of them. I could have replicated the effect of this by requiring the Russian commander to make a graduated withdrawal but I didn't think of that at the time.  We play and we learn.

We both felt that the game worked visually but wasn't as satisfying as the previous Napoleonic game, it was just a bridge too far!

A note on the use of unit types.

This post assumes some knowledge of the One Hour Wargames rules that we use, these are very easy to assimilate and are designed to give fast play games for players who are short of time and space.  For each historical period both sides are allowed up to 6 combat units, which must fall into one of four different unit types, so for WW2 games the rules provide for infantry, mortars, antitank and tanks.  

This can be rather limiting if you hanker after a larger scale game and as we are not short of time or space we have expanded on the concept by increasing the number of units used and bringing in troop types from other historical periods, i.e. the machine age (WW1) rules provide for heavy units - slow moving but hard hitting and cavalry - very mobile but with reduced fire effect (which we used for the German reconnaissance unit). Other troop types were brought in from earlier periods; the Russian Guards and German Assault units used the zouave profile - elite units that move faster and hit harder, while the Russian Partizans use the skirmisher profile - light troops, very mobile but with reduced fire effect.